The new spool holder can hold five spools of plastic for the MakerBot. For some reason we did not get a spool with the white plastic but if we had it would fit easily on to the new holder.
So with this task completed I immediately started printing parts for the Makerbot Semi I had started on weeks and weeks ago.
I had already gotten the tractor frame painted and printed (see earlier post for photos and description) so the next step was to start the cab of the semi. Now with the new colored plastic I would not have to paint the new parts.
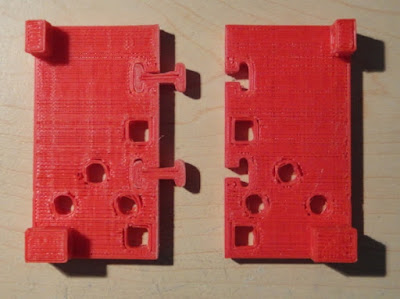
These pieces are the sides of the cab along with the floor. The floor pieces have a couple of pieces already installed in them in this photo that I call dog bones. This will hold the floor together without glue.
Here is the completed floor of the cab with the dog bones installed. The holes in the floor are the mounting holes to hold the floor in place on the frame and to mount the seats in the cab once they are printed.
These two photos are set up just like the cab floor and are of the front grill and hood assembly for the cab. I will have to make inserts for the grill in black which will make the grill stand out better once it is all put together. The parts that I printed yesterday took a total of five hours to complete. This brings the total time to print the frame and what parts you see here to 22.5 hours total. Needless to say it will be a lot more hours before the semi is completed. I will keep a running tally to let you know the grand total once it is all done. A long time to be sure. A challenge to design and build and a lot of fun along with that challenge.


No comments:
Post a Comment