Showing posts with label guitar pedal. Show all posts

Friday, August 31, 2012

Inductorless wah pedal (coloursound)

Inbetween hacking CNC drilling machines, and almost as a respite from it, we've been busy preparing some guitar effects to show off at the up-and-coming Brighton Mini Maker Faire.
As well as a variation on the earlier Fuzz Factory pedal (made during a BuildBrighton workshop) we've been trying one of these inductorless wah pedal effects -


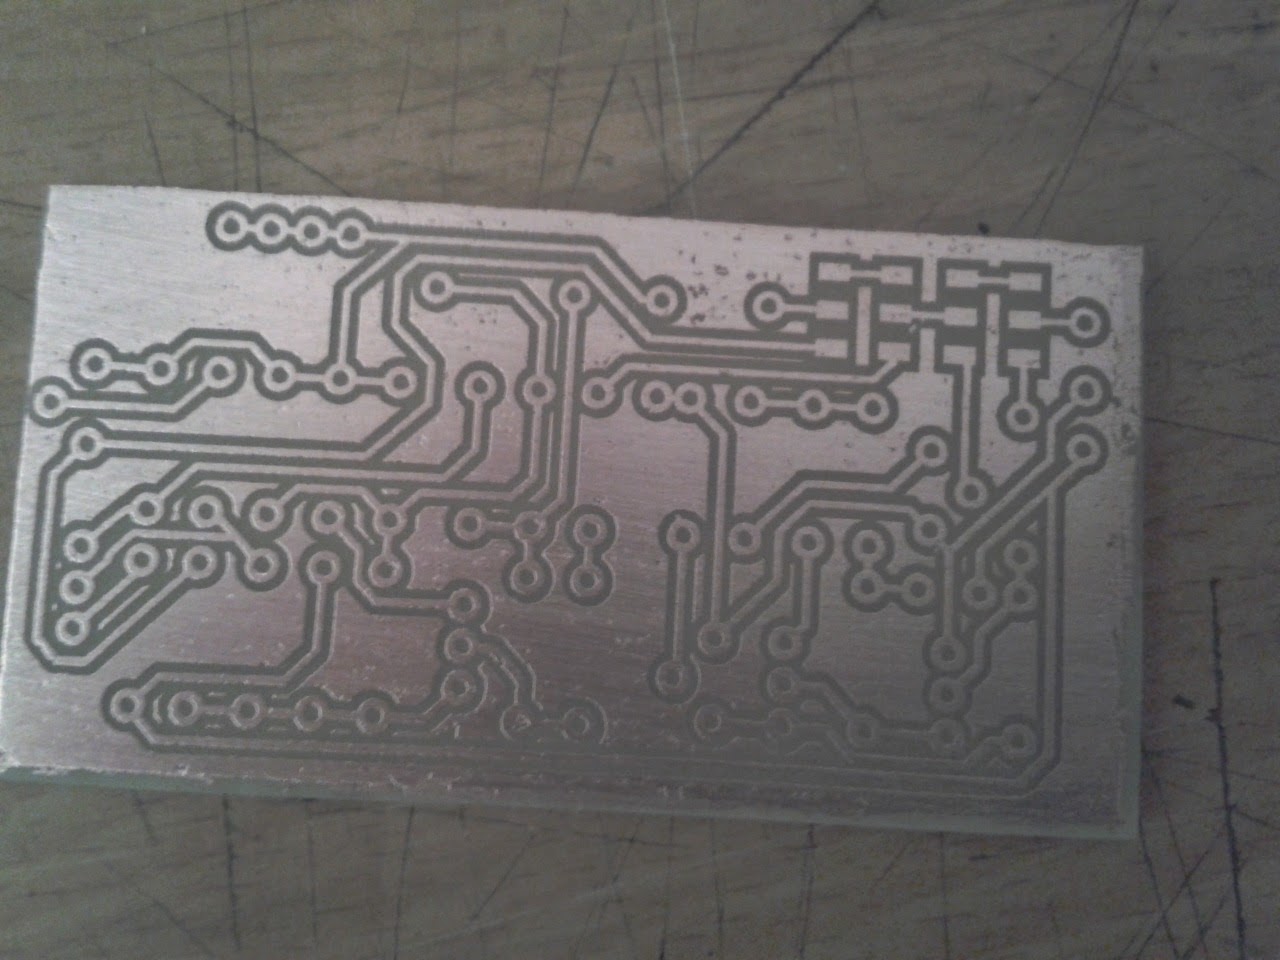
The final board size is really tiny. This is a perfect candidate for use in some kind of onboard electronics as well as a traditional pedal. Here it is alongside one of our Fuzz Factory boards (wah above, fuzz below):


When we've got it working, the idea is to replace the 100K linear pot on the wah effect (we'll leave the optional volume control out) with a digital potentiometer and use a microcontroller to set the wah intensity. This should allow us a couple of different options for activating the wah -

  • A wii controller would allow us to rock the guitar up and down, using the actual guitar body as the pedal rocker.
  • An ultrasound range finder would allow us to change the wah effect by strumming at different positions along the guitar body

In fact, once we've managed to hook up a microcontroller to control the wah effect, the possibilities are endless!

Friday, August 10, 2012

Buildbrighton stompbox grinding

Here's Joel from the earlier BuildBrighton Stompbox workshop getting busy with a new enclosure for a variation on the Fuzz Factory pedal we made. The box is actually an old (and he tells us, quite crappy) effect pedal, but with space for four knobs and a nice big stomping area, it's the perfect box to put his modified fuzz factory in.

The first job, of course, is to clean up the artwork and design a custom decal sticker. Joel attacks his enclosure with a wire brush mounted on an angle grinder....


Showing us how to do it properly - note the dust mask and safety goggles

Saturday, August 4, 2012

BuildBrighton Guitar Stompbox Workshop

It's been a long, exhausting, but ultimately satisfying day, after running the BuildBrighton guitar stompbox workshop today. There was a sell-out crowd (plus a couple of last-minute attendees, squeezed in on the day) and we had a fantastic success rate - of 12 boxes, 10 were (eventually) working by the end of the workshop!


The boxes were based on the Dallas Fuzz Factory schematic, with a couple of tweaks. Firstly, as only two pots were to be exposed on the box (drive and volume) the others used were trimmer pots (compression and gate) so each person could create their own unique sound and capture it inside the box!

Fuzz Factory Schematic

As well as making the circuits on stripboard, everyone had a go at drilling their alloy enclosures in the BuildBrighton "dirty workshop" as well as fitting all the hardware and wiring everything up.


As well as creating a circuit board from the schematics using stripboard (veroboard), everyone had to wire up all the pots, footswitch and sockets and it was amazing to get ten fully-working pedals after about six hours hard work!


Jamie Matthews was the first successful candidate to rock out with his fuzz pedal

Note how you hear the tone/flavour of the pedal changing as Tom tweaks the compression and gate trimmer pots. These pots allowed us to tailor each pedal without having to swap out lots of different components

It didn't take long for others to follow:


Though not everyone was successful on their first attempt. Jon (in this video) actually managed not only to make a crackly pedal, but a direct short across the drive pot terminals in this pedal actually caused it to smoke (shortly after this video ended). When a tiny flame appeared, it was decided to replace his pot and capacitor, just to be sure!


Not so much smoke on the water as "smoke in the pedal"

But it was great to see genuine smiles break out - the real ones that you just can't hide - as more and more pedals fuzzed and buzzed into life


For that authentic rock sound, we were using 2 x germanium transistors in each pedal. Germanium transistors are not as stable nor consistent as silicone ones, so some have a higher gain than others. Real pedal enthusiasts have been known to sit and try out loads of different transistor combinations, to get that "just right" tone. We included sockets for our transistors to all people to do this if they wanted. As time was tight, Jason spent a few hours testing all our germanium transistors and sorting them into (relatively) high and low gain. We used a low gain for Q1 (see schematic) and a high gain for Q2.

Joel, from GAK specifically asked for two high gain transistors to make  really "hot" pedal. You can hear his pedal going crazy when pushed to the top end of the range 


Here's the documentation that everyone was following. Use it to create your own fuzz-factory clone!

Stompbox Workshop

Friday, June 8, 2012

Multi-effect pedal update

The Ferric Chloride yesterday evening, so we got on with etching our multi-effect pedal board, made with the (much cheaper) press-n-peel alternative. The result was pretty impressive. In short, the cheaper alternative works as well as the real thing for us. Which is just as well, as we've invested in about 50 sheets of the stuff!


A bit of drilling and filling and a bit later, we had a populated board!


Of course, the eagle-eyed will spot that there are still components missing off this board. Can you believe we can't find a 10K or 1K rated resistor in amongst all the junk in the nerd cupboard?! It's not like we're after some obscure rated component, just some common-or-garden, everyone-uses-them 10K resistors....


Here's the board soldered up (minus a few critical components) complete with "pass-through" switches. By setting these switches, you can have the input signal directed straight to the output jack (clean sound), have it pass through the fuzz circuit then straight to output, have the input go to the wah circuit only, or have the input go into fuzz then wah before hitting the output jack.


Still not quite ready for testing, but it's looking quite promising so far....

Wednesday, June 6, 2012

Components for onboard wah pedal

While waiting for our eBay Ferric Chloride to be delivered to test-etch some Press-n-Peel alternative a different parcel appeared in the post today - it's an order from Farnell for parts for our multi-effect pedal.
There's a fabulous selection of resistors, capacitors, buttons and switches:


Also included are some rather beefy 500mH inductors. They're for use in the wah part of the effect (just hope we've left enough room on the board as they're quite chunky!)


In fact, a quick trip to Maplin might be in order to see if our local Brighton store has any ferric chloride it (it probably won't - the Brighton store must be the worst stocked Maplins in the UK - unless, of course, they're all as hopeless as this!). I'd be great to get something at least working, if not finished by the end of the day!

Friday, June 1, 2012

Multi-effect pedal

We had a great time at BuildBrighton with our working fuzzface guitar pedal. New member Patrick even brought along a VOX wah pedal to get some Voodoo Chile type riffs going!

Which got us thinking about embedding our effect pedal inside a guitar, and how to simplify the circuit. So we came up with this idea - it's an effect pedal combining a fuzz face and a wah pedal. Either or both can be by-passed (so you can have clean, just fuzz, just wah, or fuzz going into wah).

In a future version, we're planning replacing the potentiometer on the wah (labelled VR3) with a digital pot. This will allow us to hook the wah effect up to a PIC micro-controller and use a 3-axis accelerometer to change the wah sound. Tip the headstock towards the ground to simulate rocking the pedal back, then move it upwards to rock the pedal forward.

The introduction of an accelerometer on the guitar opens up all kinds of possibilities (imagine hooking it up to the volume control: tip your guitar skyward, a la Slash, for a volume boost while solo-ing!) Any way, here's the first version of our multi-pedal:

Multi Pedal schematic

Multi Pedal PCB


Parts list:


C1 2.2uf  capacitor
C2 0.01uF capacitor
C3 22uF capacitor
C4 0.01uF capacitor
C5 0.22uF capacitor
C6 4.7uF capacitor
C7 0.01uF capacitor
C8 0.22uF capacitor
L1 500mH inductor
Q1 BC108 NPN transistor
Q2 BC108 NPN transistor
Q3 BC108 NPN transistor
Q4 BC108 NPN transistor
R1 33K resistor
R2 330 resistor
R3 8K2 resistor
R4 100K resistor
R5 68K resistor
R6 1.5K resistor
R7 470 resistor
R8 470K resistor
R9 22K resistor
R10 33K resistor
R11 82K resistor
R12 470K resistor
R13 10K resistor
R14 1K resistor
SW1 = DPDT switch
SW2 = DPDT switch
VR1 = 1KB potentiometer
VR2 = 1KB potentiometer
VR3 = 100K potentiometer

Thursday, May 31, 2012

Working fuzz face pedal

Here's a video showing the fuzz face effect "pedal" working with a Peavy Raptor guitar and miniature Marshall amp.

There's a definite difference between "clean" and "distorted" sounds and we're keen to say that the whole thing works well. The only thing is, after trying out our board, Jason from BuildBrighton turned up and asked us to try out his design - and his works even better!

So we've ended up with two types of effects pedal. Our latest design is more of an "overdrive" distortion effect, whereas Jason's is very much more "fuzzy" - more reminiscent of the original FuzzFace.

(check out the video jump at about 0:44 where the video was paused while we swapped out "our" pedal for Jason's)

Monday, May 28, 2012

Guitar effects pedals

In preparation for the Mini Maker Faire in Brighton in September, we're busy designing and prototyping tiny guitar effects pedals which can be embedded behind a scratchplate.

As this involves hacking an actual instrument, it seems only sensible to keep track of where we've started from (if only so we go back to it, in the event of something going really wrong!)

The ideal starting point is not necessarily the wiring we start with - even really expensive guitars (for us, anything over about fifty quid is a really expensive guitar) can sometimes have quite shoddy wiring. So we're going to start with shielded wiring, to keep any hum and noise introduced by our effects "pedals" to a minimum.

Here's a typical three-pickup setup with shielding - note that the ground plane should be extended to the underside of the scratchplate, the tone and volume pot bodies and, if possible, the entire inside of the electrics cavity:

Shielded Wiring for Stratocaster guitar

Thursday, May 24, 2012

Basic Wah Pedal

As part of a series of up-and-coming BuildBrighton workshops, and in preparation for this year's Mini Maker Faire we're busy putting together some simple effects "pedals" that can be put together inside a guitar, to provide onboard electronics.

We've already started work on a number of fuzz-face (distortion pedal) variants.
This time it's the original Cry-Baby Wah effect that we're looking to emulate. In fact, this circuit design is quite a bit simpler than the Dunlop version, but is perfect for what we're trying to acheive - a simple, workable circuit to act as an introduction to gutiar electronics. Here's the circuit schematic:

And the PCB layout:
Wah Pedal PCB
(as ever, print onto A4 at 100% no scaling for a press-n-peel/toner-transfer-ready image for etching your own)


This is how the final PCB should be assembled:


The beauty of this simple design is that it uses a single 500K linear potentiometer to achieve the wah-wah sound. Which means we can do a lot with this design when it comes to "hacking" up our guitars later. For example, it could be replaced with a digital pot and hooked up to a microcontroller (such as a PIC or Arduino) for all kinds of funky fun!

Sunday, February 26, 2012

Fuzz Face with NPN transistors (MPSA18 amplifiers)

After amending our FuzzFace design to use a positive power supply, we've had a couple of enquiries about the schematic. Mainly that a few readers weren't familiar with the PNP transistors used (nor seeing them drawn "upside-down" in the circuit) so we've found a design that uses NPN transistors and different resistor values (including a potentiometer/variable resistor to adjust the amount of "fuzz")

FuzzFace with NPN transistors

Here's the PCB layout. We've not had chance to try this, as we're still waiting for some 20uF capacitors.


That said, we've a few 22uF caps lying around here (large black barrel electrolytic types) and since 22uF is just within the range of a 20uF with +/- 10% (and 20uF is within the range of a 22uF with +/- 20%) then it may just be a suitable replacement. We hope so, since 22uF caps can be easily found all over Farnell and eBay for just a few pence whereas the cheapest 20uF rated capacitors are about �3 each.

FuzzFace NPN pedal PBC layout
(print the above at 100% no scaling to create your own press-n-peel image for toner transfer)


Since simplifying the design (using 22uF instead of 20uF capacitor for example) we've managed to source all the components needed to make this pedal, so it's off to the nerd cupboard now to crack open the Ferric Chloride and get etching!