Friday, December 21, 2012
How to fix a spinning hexbug nano
If you have a hexbug nano, then you've probably noticed that it starts to spin in tiny circles after a while. After tinkering around with a hexbug nano, I figured out how to fix the robot's dizziness. It turns out that the problem isn't that big after all. If your experiencing this annoying problem, check out the video above.

Thursday, December 20, 2012
Merry Christmas To All My Readers

2012 has been quite a year for me here at the Tinker's Workshop. Some great projects have been created, I managed to survive a terrible fire at my home and have now moved to a new home which I am setting up a new workshop that any tinker worth his (or her) salt would love to own.
So good news has come with the bad news from all that has gone on this year and that is not always the case. I consider myself lucky in that respect. One thing has remained constant throughout this year and has brought me great joy and a laugh or two along the way. This has been all of my faithful readers of my blog. The blog is growing daily and it spurs me on to continue working on improving it and the projects that I develop and write about.
I have received a lot of support throughout this past year from all my readers. All the great comments that have continued to pour in from around the world about the projects and plans that I have posted on my blog make the effort worth while.
So I thought it best to say thanks to everyone before the holidays get any closer. You have once again made my year a good one. Especially with all that has gone on. It means a great deal to me and with that in mind I wish to say thank you for another great year and I wish all of you a very Merry Christmas and a joyous New Year.
Sincerely,
Dave Langkamp
The New Tinker's Workshop.... A Work In Progress
Since the blizzard here in the Midwest has me snowed in today I thought I would post a couple more photos of the work that I've completed on the new Tinker's Workshop.


The ceiling panels slid into place without a lot of hassle so here is how it turned out. I know that the green paneling is disgusting and that will be on the list of things that will still need to be changed in the workshop along with the removal of the carpeting. Luckily the carpet had not been glued to the concrete floor so this will be an easy task to just roll up and drag out.


These panoramic views of the workshop give you a good idea as to how big the new space really is. It will really start taking shape once I can get the wall and new doorway by the steps put in and the double door at the other end of the shop. Step by step I'm getting closer to my dream shop.
Working word clock pcb at last!
Having created a pcb from our earlier design, we've finally had time to sit and work out the pinout. And this time we're delighted to report that it actually works. Each pin on the 24-pin connector performs just one task and the correct combination of power and ground onto the pins causes just one LED to light up at a time. Result!
Here's the pin-out from the earlier pcb. The pins along the bottom need to be pulled to ground, while the pins along the edge should have power applied to them:

So if, for example, we put power onto pin2 and pull pin 23 low (to ground) the single LED in the top left corner of the matrix should light up. Repeat as necessary for each individual pin and we've finally got a fully working, individually addressable LED matrix. Yay!
Source code for the word clock to follow.....
Here's the pin-out from the earlier pcb. The pins along the bottom need to be pulled to ground, while the pins along the edge should have power applied to them:

Source code for the word clock to follow.....
Tuesday, December 18, 2012
Romo, the iPhone's favorite robot!
Watch out Sphero, there's a new mobile robot on the market! Developed by a new company called Romotive, Romo is a small iPhone-friendly robot. Unlike Sphero, he has a lot of "emotion. By emotion, I mean facial expressions followed by interesting sounds. All this is made possible because Romo requires an iPhone or iPod touch to be connected to it at all times. Aside from all that, this little bot also has LED's, a sleek design, and tracks for smooth mobility. Although this robot hasn't hit the store shelves yet, you can still pre-order one for $150 off the Romotive website. Thanks for reading and plus 1 if you liked today's post!
I Can See! I Can See!
Work has been progressing nicely on the new Tinker's Workshop with the installation of the badly needed lighting over the past couple of days. Here is a re-post of an earlier photo to show you what a difference the lighting has made to the work space.


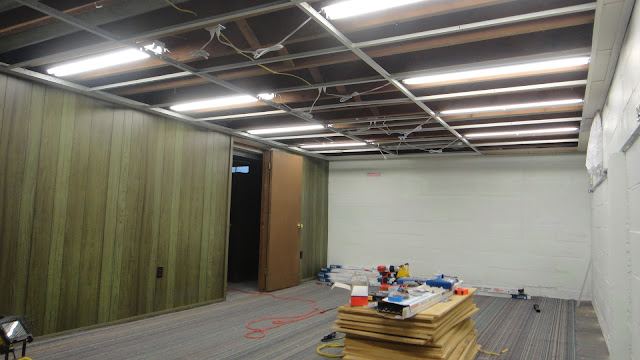
The next step in the build will be to put the ceiling panels back in place along with translucent panels where the florescent lights now are mounted. This should spread the light around the room a bit more evenly.


This is the original lighting in the space....YUK!

Now this is lighting! I went from one single double florescent light fixture to ten! What a difference. Believe it or not the doorway on the right of the photo goes into the rest of the basement and the lights are on in that room. Really! That space also will be updated with more lighting so I can see where I am going in that part of the basement.

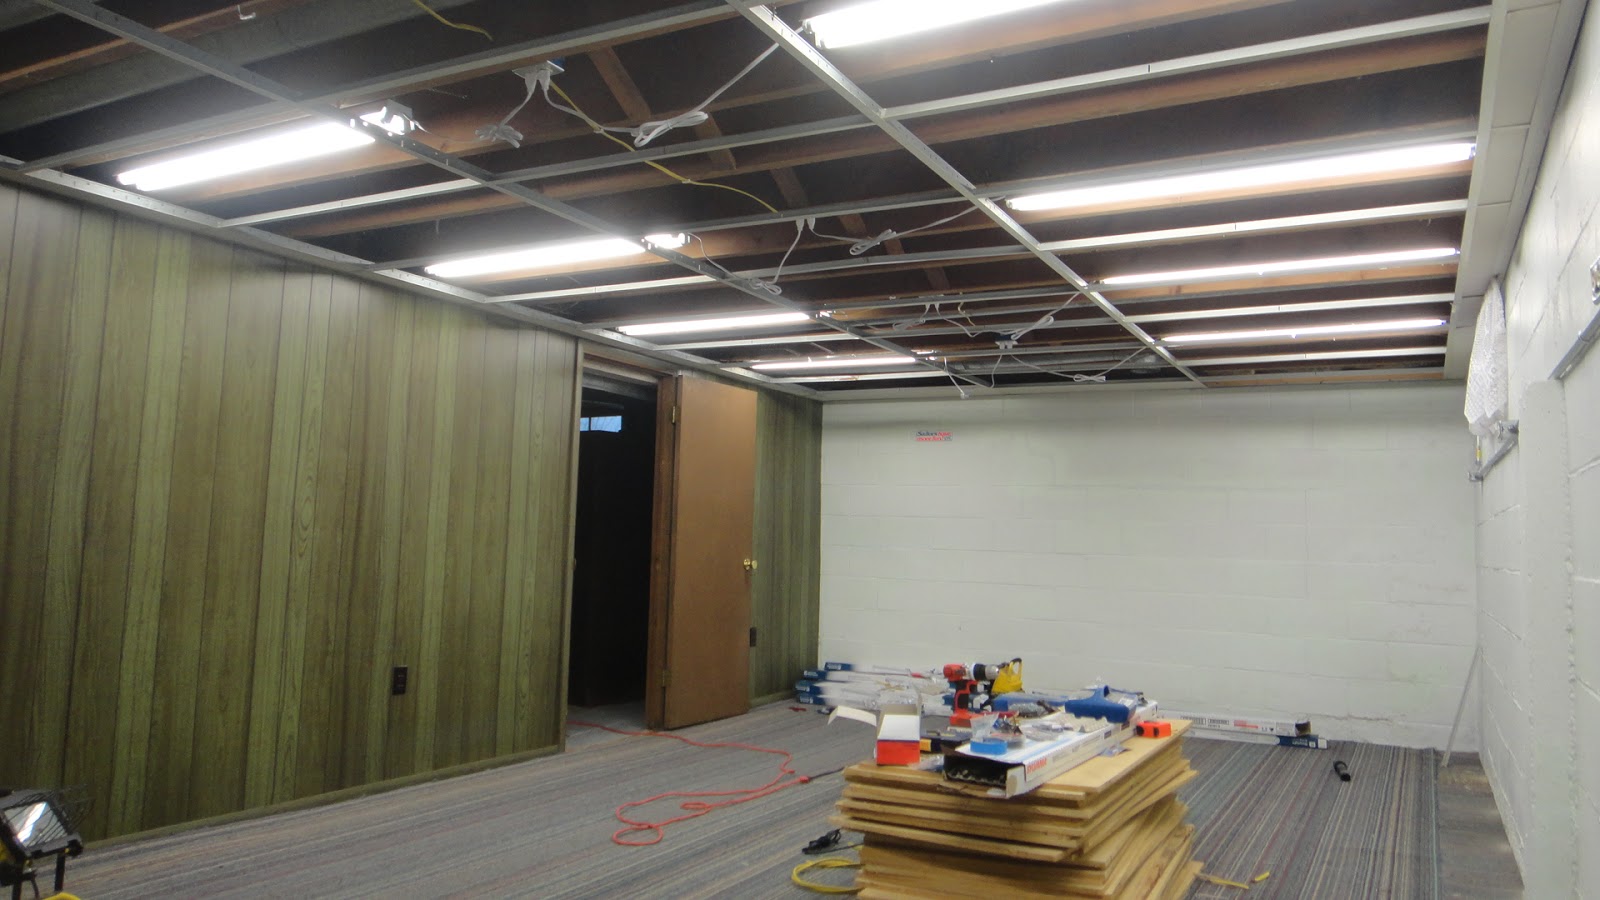
The next step in the build will be to put the ceiling panels back in place along with translucent panels where the florescent lights now are mounted. This should spread the light around the room a bit more evenly.

The lights were originally going to be hardwired into the electrical grid but this was discarded as it would have actually made more work and difficulty in putting it all together. Just much simpler just to put up five electrical outlets to plug in the ten lights in the workshop. The lighting was also split up so that only four lights could be turned on, or six or all ten at the same time. Makes for a savings in power usage when not all the lights are need to be turned on depending on what I want to work on in the shop.


Three additional outlets were also installed in the shop on the outer wall of the workshop to make a grand total of eight. This was done using 1/2 inch electrical conduit which houses the wiring for each outlet. The outlets were mounted on the wall using drilled holes in the concrete and plastic inserts and screws to hold it all in place. The power was run across the ceiling down the wall to one outlet, then onto two more outlets horizontally across the wall. Then another power line was sent back up to the ceiling where it terminates. This was done for future connections if I choose to put them into the shop.
Along with the ten lights and eight electrical outlets, the new shop will have two doors, one regular sized and another double wide to handle moving big items in and out of the shop. Another plus that I did not have in the old shop was a connection for a telephone. Not that I want to be interupted while I am building something fun but there is always a need for a phone some time when you are working in the shop so it will be a nice addition.
Now that I have the power and lights up and running in the shop thanks to my good friend Garry, I will be able to see much better when I paint that ugly green paneled wall a nice coat of white paint. Garry is my house expert and so his expertise is worth the little favors that I am more than happy to do for him and his family when he needs the help. It all works out in the end.
The carpeting will also be removed as it is totally worthless in a workshop. It won't be long before I can get back to creating something new in my new and improved dream workshop so all the work to get it together will be worth the wait don't you think? Check back to see how it all turns out and have a good day tinkering!
Some SD cards don't like SPI mode and low voltages
It's a sad fact that some SD cards work differently to others.
Although there's a set of "standards" that all (most?) SD cards are supposed to adhere to, the degree of variance between cards is huge.
And we've just wasted about a month trying to fix a problem "properly" instead of doing the pragmatic thing and just hacking a solution together.
A while ago we started adapting some noise-playing alarm clocks. We completely replaced the onboard sound chip with one of our own design, which plays uncompressed wavs from an SD card. It took a lot of working out to get the SD card actually readable and when we thought we'd cracked it, put the audio player board back inside the alarm clock and gave it a try.
Incredibly, it worked first time!
And second time.
And third. But not the fourth.
In fact, after just a few plays, the SD card refused to initialise properly.
It all came down to the supply voltage. At 5v, we put the supply through a voltage regulator to give a steady 3.3v out. Everything worked fine. We put the boards into the alarm clocks and ran them off the 3v that 2xAA batteries created. In truth this was sometimes as high as 3.2v.
After just a few plays, the tiny voltage drop in the batteries was enough to stop the SD card from working.
But that's not where the story ends. Because we've spent about a month trying to use different triggering mechanisms, DC-to-DC converters, opto-isolators, PNP transistors and more yet all the time we had a working prototype on the desk. The circuit was exactly the same, we kept going back to the same (rough-and-ready) firmware. But all the time the prototype worked while every new version didn't.
And then we spotted the difference.
The prototype was using a genuine SanDisk micro sd card. The newer boards were using another brand. And that was enough to make a difference! SanDisk cards are pretty robust and can handle a wide range of supply voltages - cheaper, inferior brands can't.
So after a month of trying to build a circuit which is 100% compatible with all brands of SD cards, we've finally given up. And decided to only support a small sub-set of available cards on the market. It's not ideal. But it'll let us get these bloody clocks made up and shipped, hopefully this time of Christmas!!

Although there's a set of "standards" that all (most?) SD cards are supposed to adhere to, the degree of variance between cards is huge.
And we've just wasted about a month trying to fix a problem "properly" instead of doing the pragmatic thing and just hacking a solution together.
A while ago we started adapting some noise-playing alarm clocks. We completely replaced the onboard sound chip with one of our own design, which plays uncompressed wavs from an SD card. It took a lot of working out to get the SD card actually readable and when we thought we'd cracked it, put the audio player board back inside the alarm clock and gave it a try.
Incredibly, it worked first time!
And second time.
And third. But not the fourth.
In fact, after just a few plays, the SD card refused to initialise properly.
It all came down to the supply voltage. At 5v, we put the supply through a voltage regulator to give a steady 3.3v out. Everything worked fine. We put the boards into the alarm clocks and ran them off the 3v that 2xAA batteries created. In truth this was sometimes as high as 3.2v.
After just a few plays, the tiny voltage drop in the batteries was enough to stop the SD card from working.
But that's not where the story ends. Because we've spent about a month trying to use different triggering mechanisms, DC-to-DC converters, opto-isolators, PNP transistors and more yet all the time we had a working prototype on the desk. The circuit was exactly the same, we kept going back to the same (rough-and-ready) firmware. But all the time the prototype worked while every new version didn't.
And then we spotted the difference.
The prototype was using a genuine SanDisk micro sd card. The newer boards were using another brand. And that was enough to make a difference! SanDisk cards are pretty robust and can handle a wide range of supply voltages - cheaper, inferior brands can't.
So after a month of trying to build a circuit which is 100% compatible with all brands of SD cards, we've finally given up. And decided to only support a small sub-set of available cards on the market. It's not ideal. But it'll let us get these bloody clocks made up and shipped, hopefully this time of Christmas!!

Subscribe to:
Posts (Atom)